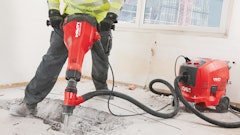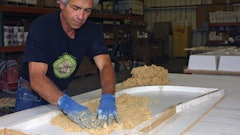
Hard goods such as wood, laminate flooring, ceramic tiles and quarry tiles are usually applied directly to a concrete floor using adhesives. When removing this type of flooring, it is particularly important that contractors have the right tools for the job. Here Nick White, UK and Ireland country manager at surface preparation company National Flooring Equipment, gives contractors advice on how to effective hard goods removal.
No two floor preparation applications are the same. Each facility will have a different combination of floor covering, adhesive and substrate condition. So, taking the time to make the right choices will be integral to the success of the job.
Hard Goods Removal Accessories
While machine choice is important in hard goods removal, contractors should also carefully consider what tools and blades they require to effectively remove the covering and the adhesive underneath.
Typically, contractors use shanks to remove hard goods. The angle of the tool allows them to slide it underneath the floor and lift larger pieces, rather than chipping off small areas, reducing removal times without compromising on accuracy.
Contractors should adapt methods for each floor covering. For example, when removing wooden floors, contractors should use a scarifier equipped with a cutting blade to make cuts across the surface. This allows the contractor to lift the wooden floor in sections and avoid splitting the material. Contractors should also consider where to start removing material. For example, there may be expansion joints in a concrete floor so approaching a floor diagonally could avoid the tools catching the lip of a joint and causing damage.
Removing Tricky, Sticky Adhesives
Some adhesive can be particularly tricky to remove. So, once the hard good has been lifted, contractors should switch to a sharper blade and increase the angle between the machine and the floor. Depending on the machine, changing the pitch can either be done manually or with a lever.
Changing the blade and its angle enables the contractor to peel the adhesive off the concrete floor more effectively. The contractor can select the right blade by assessing the material on the surface; a normal blade can be used to cut hard deposits off the floor, but a razor blade is needed for sticky substances.
Using the Right Blade
It’s vital that all remaining adhesive is removed before the new floor is laid, or it can ruin the aesthetic of the new flooring. However, it’s very easy to damage the concrete underneath if the correct blade isn’t used. To make sure you get it right, contractors should use a blade at a shallow angle and making small adjustments until the correct pitch is found for optimum efficiency.
Bear in mind that there are also different recommendations for different types of flooring. For example, if a wooden covering is present, contractors should use a bevel-up bevel-down blade, which has a rounded edge at the bottom as this causes less damage to the floor.
Using the wrong blade or angling it incorrectly to remove a covering or an adhesive will not only damage the floor, it could also affect the machine and its tools. If the blade is digging into the floor because the pitch is incorrect, the blade will wear more quickly. If the operator hits something, it can cause the blade to snap, damaging the machine. If the contractor doesn’t use enough pitch, the machine will jump over the flooring without removing it, as it lacks the downward pressure on the blade.
Hard goods are an extremely popular choice of floor covering, but contractors can easily become stuck when removing it. Remember, it’s not all about machine choice — the tools and how you use them are equally as important.
Written by Nick White, UK and Ireland country manager, National Flooring Equipment.






![Glp Porsche 072723 465 64ee42287c29e[1]](https://img.forconstructionpros.com/files/base/acbm/fcp/image/2024/03/GLP_PORSCHE_072723_465.64ee42287c29e_1_.65e88b8589b9c.png?auto=format%2Ccompress&fit=crop&h=135&q=70&rect=0%2C520%2C2250%2C1266&w=240)


