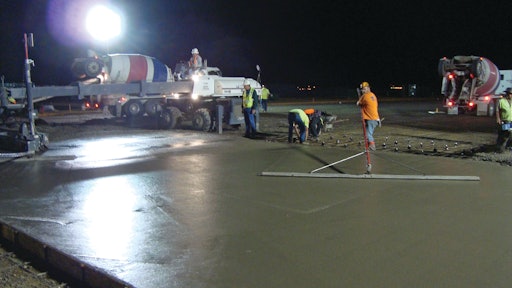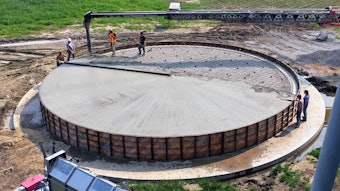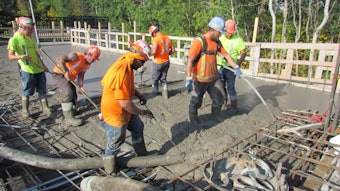
With modern finishing equipment, it has become relatively easy for flatwork finishers to achieve overall floor flatness/levelness numbers of FF35 and FL25 — commonly specified tolerances for warehouse and industrial floors. However, you can achieve even flatter floors — 45, 60 and higher — by understanding what causes floors to become less flat and finishing tips to make floors flatter.
FF/FL numbers
Floor flatness (FF) controls the local bumpiness of the floor surface and is primarily affected by the finishing operations after screeding, including restraightening and power floating. Essentially, FF numbers evaluate the elevation differences along a sample line at 1-foot intervals. F numbers extend from zero to infinity so the higher the F number, the flatter the floor.
Floor levelness (FL) controls the departure of the floor surface from the specified slope or plane of the surface. FL numbers evaluate the elevation differences along a sample line at 10-foot intervals. The higher the FL number, the more level the floor. Levelness of the edge forms and the accuracy of the concrete screeding operation control the overall levelness of the floor. A self-propelled, laser-guided screed can routinely create FL numbers of about 35 and higher.
FF/FL numbers have the following floor flatness classifications: FF25/FL20 – moderately flat, FF35/FL25 – flat, FF45/FL35 – very flat and FF60/FL40 – super flat. The scale is linear so a FF60/FL40 floor is twice as flat and level as a FF30/FL20 floor.
Read "How to Hand-Trowel Edges and Joints to Match Power Trowel Finishes"
Restraightening
Restraightening is a cut-and-fill process. It consists of cutting down high spots or mortar ridges and filling low spots. Conventional finishing steps essentially make the floor less flat, especially when using 4- to 5-foot-wide bull floats and power trowels fitted with float or combination blades. Restraightening produces flatter floors and can increase FF numbers from about 30 to 50 percent.
Restraightening tools include channel floats, modified highway straightedges (sometimes called bump cutters) and check rods. These tools vary in length from about 8 to 16 feet and either have turned-up edges or rectangular cross sections. Because of the square-edged corners, these tools can cut high spots and move surplus mortar to low spots.
For large concrete placements using laser-guides screeds, these tools are primarily used after screeding and before excess bleedwater accumulates on the surface. As shown in Figure 1, always restraighten the “mend” and “grout” lines. Otherwise, there will be high spots along these lines that will reduce the flatness of the floor. The modified highway straightedge is the tool of choice because it can also be used as a reference line to identify high and low spots on the floor surface.
If you have trouble using the modified highway straightedge after screeding because it digs into the surface, then use an 8- to 10-foot-wide channel float or check rod. Do not use a 4- to 5-foot bull float. A bull float can smooth the surface but it cannot perform the cut-and-fill process; and due to its short length, its use will reduce the floor flatness. Also, make sure your straightedge, whether it is modified highway straight edge or not, is straight and true. If warped or damaged, you will make the floor less flat.
If needed, you can angle a restraightening tool about 45 degress to the axis of screeding and overlap the previous pass by about 50 percent of the straightedge width. However, be careful not to undo the flatness produced by the laser-guided screed.
Pan floating
Pan floats are circular metal disks that clip on to the blades of either a walk-behind or a ride-on power trowel. Pan floats make floors flatter by generating and moving “cream” or surface mortar. Pans easily remove surface imperfections, cut humps and fill in holes and low spots — that’s why power floating with pans is so important. Expect a 10- to 25-point increase in F numbers when floating with pans instead of float blades. Pan floats are wider and flatter than float blades, pans cause less dishing and troughing due to the reduced contact pressure compared to float blades, and pans minimize surface variations due to bent arms and float blades.
It is important to start power floating early while the concrete is still plastic. However, starting too soon can create too much surface mortar reducing the floor flatness, especially when using a laser-guided screed. Laser-guided screeds can produce FF numbers in the high 40s and 50s, but power floating too soon can undo or reduce the surface flatness created by the laser-guided screed. Delay power floating until you leave no more than a 1/8-inch footprint in the concrete. Otherwise, you increase the risk of cutting troughs and creating surface waves that will reduce the floor flatness.
Timing can be judged by the height of the mortar ridge or “windrow” created by a ride-on trowel fitted with pan floats. Since the pans do not overlap, a mortar ridge is created between the pans. Starting too early creates excessive ridge heights, and the floor will require restraightening to restore the surface flatness. Ideally, ridge heights should be approximately 1/8 inch to ensure there is sufficient mortar to fill holes and low spots. When ridge heights start to exceed 1/8 inch, back off and wait; let the concrete become stiffer so you don’t generate and move too much mortar with the pans.
Always make the first float pass perpendicular to the direction of screeding and make subsequent passes perpendicular to the previous pass. Do not make float passes in only one direction; doing so creates waves and subsequent one directional passes makes the waves deeper. Alternating the direction of the float passes makes the floor flatter. Always overlap each pass by one-half the pan diameter to minimize troughing. If a mortar ridge exists from a previous pass, overlap the previous pass so the center of a pan is on the mortar ridge; removing mortar ridges makes the floor flatter.
To properly prepare a floor for troweling, multiple float passes are required. Make at least two float passes in two different directions (perpendicular to each other). Four or more passes in multiples of two makes the floor flatter, if done correctly. Some finishers claim making late float passes at 45-degree angles to earlier passes will make the floor flatter. Also, using large pans and heavy ride-on machines with multiple passes can make the floor even flatter.
Except for the first float pass, run the ride-on trowel at full speed so the machine is easier to control. Slow down on the first float pass to minimize the risk of troughing if the concrete is too soft or if you hit a wet spot. Avoid sharp, forward turns that cause the pans to dig into the soft surface creating low spots. Consider using a forward-backward pass technique to avoid forward turns on the first float pass. Remember, creating and moving too much surface mortar typically makes the floor less flat.
For edges, power float with a pan directly on or over the edge form. If the floor edges are low and need to be built up, make forward float passes along the edge. Otherwise, make backward passes with a pan on or over the form edge. Never let a machine run or sit in one spot too long and avoid going sideways with a ride-on trowel. Also, minimize activities that disrupt the floor surface such as walking in the fresh concrete after strikeoff or walking on the floor while still soft enough to leave footprints. Anything that disrupts the floor surface requires restraightening and typically makes the floor less flat.
Timing of FF/FL measurements
Due to concrete shrinkage and slab curling, FF/FL numbers diminish with time. Specifically, joints and cracks curl making the floor less flat with the passage of time. Therefore, flatness and levelness should be measured as soon as possible, preferably within 24-hours after concrete placement but no later than 72 hours. Otherwise, FF and FL numbers may not represent the true performance of your work.
Routinely placing very flat and super flat floors requires an understanding of floor flatness and how to properly use the equipment. More importantly, it requires practice and continuous self-evaluation. Always review your FF/FL numbers and critique your placing and finishing techniques. Then make adjustments and improve on your next placement.
References
ACI 117-10 Specifications for Tolerances for Concrete Construction, American Concrete Institute, www.concrete.org.
ACI 302.1R-04 Guide for Concrete Floor and Slab Construction, American Concrete Institute, www.concrete.org.


